
Craftsman Power Washer Owners Manual: A Comprehensive Guide
This manual provides essential guidance for Craftsman power washer operation, maintenance, and troubleshooting. SBD’s relaunch focuses on value, mirroring Porter-Cable, while TTI manufactures many Craftsman tools.
Welcome to the world of Craftsman power washers! These robust machines are designed for a variety of cleaning tasks, from revitalizing siding to prepping surfaces for staining. Following the 2019 acquisition by SBD, Craftsman aims to deliver dependable performance at a competitive price point. Many Craftsman power tools, including these washers, are manufactured by TTI, the same company behind Milwaukee, Ridgid, and Ryobi.
Understanding your power washer’s capabilities and adhering to safety guidelines will ensure efficient and long-lasting use. This manual will guide you through every step.
Understanding Your Model Number
Your Craftsman power washer’s model number is crucial for identifying specific features and obtaining the correct parts. This number, often found on a plate affixed to the unit, provides vital information about the engine’s horsepower (like the 6.0 HP models) and pressure output (e.g., 2350 PSI).
Knowing the model number simplifies troubleshooting and ensures compatibility when ordering replacement components. Refer to this number when contacting customer support or searching for online resources.
Safety Precautions
Prioritize safety when operating your Craftsman power washer. Always read the owner’s manual before use. Be aware of high-pressure spray hazards – never point the wand at yourself or others. Keep a safe distance and wear appropriate eye protection.
Ensure the unit is stable and operate on a level surface. Never modify the pressure settings beyond the manufacturer’s recommendations. Disconnect the power source before performing any maintenance.
General Safety Rules

Adhering to these rules ensures safe operation. Always inspect the power washer before each use, checking for damaged parts. Never operate the unit if it’s malfunctioning. Keep children and pets away from the work area. Wear closed-toe shoes and avoid loose clothing.
Be mindful of electrical connections and avoid using the washer in wet conditions. Read the owner’s manual thoroughly before operation to understand all safety guidelines.
High-Pressure Spray Hazards
High-pressure spray poses significant risks. Never point the wand at yourself or others. The force can cause serious injury. Avoid spraying electrical components or outlets. Be cautious when cleaning delicate surfaces, as high pressure can cause damage.
Always maintain a safe distance and use appropriate nozzles for the task. Improper use can lead to lacerations or injections, requiring immediate medical attention.
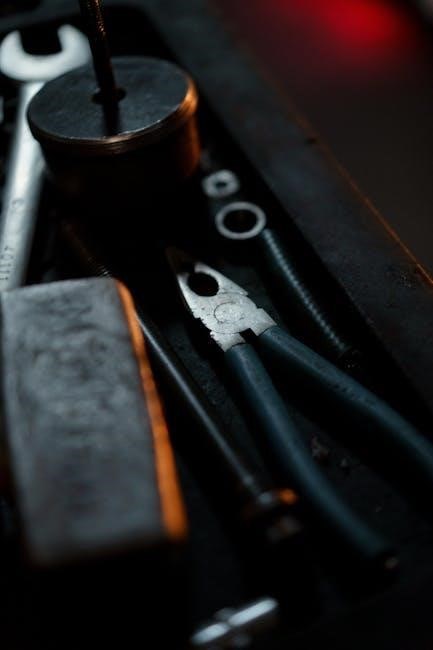
Component Identification
Familiarize yourself with key components for safe operation. The pump assembly generates high pressure. Note the engine details – horsepower (6.0 HP in some models) and type. Locate the hose and nozzle connections for proper attachment.
Identify the oil fill location for engine maintenance. Understand the function of the trigger and safety latch. Recognizing these parts ensures effective use and upkeep of your Craftsman power washer.
Pump Assembly
The pump assembly is the heart of your Craftsman power washer, developing the necessary high pressure for cleaning. It requires cool water flow to prevent overheating; avoid prolonged trigger locking.
Regular inspection is crucial for identifying potential leaks. The pump’s internal components work in tandem with the engine to deliver consistent performance. Proper maintenance extends the pump’s lifespan and ensures optimal cleaning power.
Engine Details (Horsepower & Type)
Craftsman power washers utilize gasoline engines, typically ranging in horsepower to deliver adequate power for various cleaning tasks. A common configuration includes a 6.0 horsepower engine, paired with a pump capable of producing 2350 PSI at 2.2 GPM.
Engine type impacts performance; ensure proper oil levels are maintained via the oil fill port for optimal operation and longevity. Refer to the manual for specific engine details.
Hose and Nozzle Connections
Securely attaching the high-pressure hose is crucial for safe operation. Hand-tighten connections to prevent leaks, ensuring a firm seal. Always keep the hose clear of the engine muffler to avoid damage from heat.
The nozzle connects to the wand, dictating spray pattern and intensity. Select the appropriate nozzle for the cleaning task. Incorrect connections can lead to reduced pressure or spray inconsistencies.
Assembly Instructions
Before initial use, proper assembly is vital for optimal performance and safety. Begin by carefully attaching the high-pressure hose, ensuring a hand-tightened, leak-proof connection. Next, securely connect the chosen nozzle to the spray wand.
Finally, add the appropriate engine oil, locating the oil fill port for easy access. Refer to the engine specifications for the correct oil type and quantity.
Attaching the Hose
Securely connecting the high-pressure hose is the first assembly step. Align the hose fitting with the designated outlet on the pump assembly. Hand-tighten the connection firmly, ensuring a snug fit to prevent leaks during operation.
Important: Always keep the hose clear of the engine muffler to avoid damage from heat. Double-check the connection before starting the engine.

Connecting the Nozzle
Select the appropriate nozzle for your cleaning task. Carefully align the nozzle with the hose connector and firmly push it into place until it clicks or locks securely.
Ensure a tight connection to prevent the nozzle from detaching during high-pressure spraying. Different nozzle types offer varying spray patterns; consult the nozzle selection guide for optimal use.
Adding Oil (Oil Fill Location)
Locate the oil fill port on the engine, typically marked with an oil can symbol. Before adding oil, ensure the engine is cool and on a level surface.
Use the recommended oil type and weight specified in the manual to prevent engine damage. Carefully remove the oil fill cap and slowly pour in the oil, checking the dipstick to avoid overfilling.
Operation Instructions
Before starting, ensure all connections are secure – hose, nozzle, and water supply. Begin by priming the pump, following the manual’s specific instructions.
Start the engine according to the outlined procedure, using the starter lever. Adjust pressure settings to suit the cleaning task, starting with a lower setting. Employ proper spraying techniques, maintaining a safe distance from surfaces.

Starting the Engine
Prior to starting, verify sufficient oil levels and a connected water supply. Turn the fuel valve to the ‘on’ position. Engage the choke if the engine is cold, and slowly pull the starter rope until the engine attempts to ignite.
Once running, gradually disengage the choke. Use the starter lever as instructed. If it fails to start, consult the troubleshooting section; avoid continuous pulling.
Adjusting Pressure Settings
Your Craftsman power washer features adjustable pressure settings, typically controlled by a knob or dial. Begin with the lowest setting for delicate surfaces, gradually increasing pressure as needed for tougher cleaning tasks.
Experiment on an inconspicuous area first to assess the impact. Higher PSI settings are suitable for concrete, while lower settings protect wood or siding. Avoid exceeding the recommended PSI for any surface.
Proper Spraying Techniques
Maintain a consistent distance from the surface – typically 8-12 inches – for even cleaning. Use sweeping motions, overlapping each pass slightly to avoid streaking. Always spray downwards to prevent water from getting under siding or into electrical outlets.
Avoid prolonged spraying in one spot, as this can damage the surface. Select the appropriate nozzle for the task, and remember to wear safety glasses!
Maintenance Schedule
Regular maintenance extends your power washer’s life. Clean nozzles after each use to prevent clogging and ensure optimal spray patterns. Check oil levels before every operation, adding oil as needed through the designated fill port.
For winter storage, fully drain the pump and hoses to prevent freezing damage. Consider using a pump protector to safeguard internal components during prolonged inactivity.
Cleaning the Nozzle
A clogged nozzle drastically reduces cleaning performance. After each use, disconnect the nozzle and inspect for debris buildup. Use a thin wire or the nozzle cleaning tool (if provided) to carefully clear any obstructions.
Avoid using sharp objects that could damage the nozzle’s orifice. Rinse the nozzle thoroughly with water before reattaching it to the wand, ensuring a consistent spray pattern.
Checking Oil Levels
Maintaining proper oil levels is crucial for engine longevity. Before each use, and especially after the first few, check the oil level using the dipstick located at the oil fill port. Ensure the power washer is on a level surface.
Add oil as needed, using the type specified in the manual, to reach the “full” mark. Low oil levels can cause severe engine damage.
Winter Storage Procedures
Proper winterization prevents damage from freezing temperatures. Before storing for the season, completely drain the pump and hose. Disconnect and drain the fuel tank to prevent fuel degradation. Add fuel stabilizer if leaving fuel in the tank.
Change the oil before storage. Remove the spark plug and pour a small amount of oil into the cylinder, then pull the starter cord. Store in a dry, protected location.
Troubleshooting Common Issues
If the engine fails to start, check the fuel level, spark plug, and air filter. Low pressure output may indicate a clogged nozzle, kinked hose, or pump issue. Inspect and clean or replace accordingly.
Pump leaks require immediate attention; tighten connections or consult a qualified technician. Always refer to the owner’s manual for detailed diagnostics and safety precautions before attempting repairs.
Engine Won’t Start
When the engine refuses to start, first verify sufficient fuel is present. Inspect the spark plug for fouling and replace if necessary. Ensure the air filter isn’t obstructed, hindering airflow. Check the oil level – a low level triggers safety shutdowns.
Confirm the choke is properly engaged for cold starts. A flooded engine may require repeated pulls with the choke disengaged. Consult the manual for specific engine troubleshooting steps.
Low Pressure Output
Reduced pressure often indicates a nozzle issue; inspect for clogs and clean or replace as needed. Verify the water supply provides adequate volume and pressure to the unit. Examine the high-pressure hose for kinks or damage, restricting flow.
A worn pump or inlet filter blockage can also cause low pressure. Ensure the pump oil is at the correct level. Prolonged operation without trigger engagement can overheat the pump, reducing output.
Pump Leaks
Pump leaks typically originate from loose connections or worn seals. Carefully inspect all hose connections and tighten them securely. Examine the pump’s oil seals for cracks or damage; replacement may be necessary.
Low oil levels can contribute to pump failure and leaks. Ensure the pump is adequately lubricated. Persistent leaks suggest internal pump damage, potentially requiring professional repair or component replacement to restore functionality.
Understanding PSI and GPM
PSI (pounds per square inch) measures the water’s force, determining cleaning power. Higher PSI tackles stubborn grime, but can damage delicate surfaces. GPM (gallons per minute) indicates water flow volume, impacting rinsing efficiency.
A 2350 PSI, 2.2 GPM Craftsman model balances power and control. Understanding both metrics is crucial for selecting the appropriate nozzle and pressure setting for each cleaning task.
What is PSI?
PSI, or pounds per square inch, is the unit measuring the pressure exerted by the water stream. It directly correlates to the cleaning force—higher PSI means greater impact. A Craftsman power washer boasting 2350 PSI delivers substantial cleaning capability.
However, excessive PSI can harm surfaces. Selecting the correct nozzle and adjusting pressure settings are vital to prevent damage while effectively removing dirt and grime.
What is GPM?
GPM stands for gallons per minute, representing the volume of water discharged by the power washer. A higher GPM rating indicates a wider, more expansive spray coverage, aiding in quicker cleaning of larger areas.
A Craftsman model with 2.2 GPM balances cleaning power with water conservation. GPM, combined with PSI, determines overall cleaning effectiveness; higher numbers don’t always equate to better results.

Craftsman Power Washer History & Manufacturing
Craftsman’s journey reflects shifts in ownership and manufacturing strategies. SBD acquired the Craftsman name in 2017, aiming for a midrange, value-priced brand, similar to Porter-Cable.
Notably, TTI—the parent company of Milwaukee, Ridgid, and Ryobi—manufactures a significant portion of Craftsman power tools. This connection explains design similarities and component sourcing across brands.
SBD Acquisition and Relaunch

In December 2019, SBD began revitalizing the Craftsman brand, positioning it as a value-focused alternative in the power tool market. This involved substantial engineering efforts to develop a broad range of products quickly.
The relaunch strategy mirrored SBD’s success with Porter-Cable, emphasizing affordability without sacrificing essential functionality. This included adopting storage solutions resembling T-Stak, while Dewalt maintained its premium Toughsystem.
TTI Manufacturing Connections (Milwaukee, Ridgid, Ryobi)
Techtronic Industries (TTI) is a significant player in power tool manufacturing, producing tools under well-known brands like Milwaukee, Ridgid, and Ryobi. Many are unaware that TTI also manufactures a substantial portion of Craftsman power tools.

This widespread manufacturing capability makes it plausible that Craftsman tools share design elements or components with those from other TTI brands. Hand tool manufacturers frequently re-brand products, a common industry practice.
Nozzle Selection Guide
Choosing the correct nozzle is crucial for effective cleaning. Different nozzles deliver varying spray patterns and intensities, suited for diverse tasks. A 0-degree nozzle provides a concentrated stream for stubborn dirt, while a 25-degree nozzle offers a wider fan for general cleaning.
40-degree nozzles are ideal for delicate surfaces, and soap nozzles are designed for applying detergents. Understanding these differences ensures optimal performance and prevents damage.
Different Nozzle Types & Uses
Craftsman power washers utilize several nozzle types for specialized cleaning. The 0-degree nozzle excels at stripping paint and removing deeply embedded grime, but requires caution due to its intensity. A 15-degree nozzle tackles tougher stains on concrete, while 25-degree options are versatile for siding and decks.
40-degree nozzles gently clean cars and windows, and soap nozzles efficiently distribute detergents. Selecting the appropriate nozzle maximizes cleaning power and minimizes surface damage.
Air Compressor Model Information (106.173640)
The Craftsman air compressor, model 106.173640, is a 2hp, 20-gallon, 100 psi twin-cylinder portable unit. Originally purchased in 1967, this horizontal compressor represents a vintage design. Owners often seek manuals or information regarding its operation and maintenance after decades of use.
Its robust construction suggests durability, but age necessitates careful inspection of components before operation.
Table Saw Manufacturing Details (Emerson ⎯ 113.298761)
Craftsman table saw model 113.298761 is manufactured by Emerson. The date code, 92211.0470, provides insight into its production timeframe. Notably, this model features a five-digit numerical prefix, differing from some earlier Craftsman saws with only four digits.
The ‘9’ in the date code doesn’t represent 1989 or 1999, indicating a unique coding system employed by Emerson during that period.
Date Codes and Manufacturing Origins
Understanding Craftsman date codes reveals manufacturing origins and production timelines. For example, the table saw model 113.298761’s code, 92211.0470, signifies a specific production period by Emerson. The initial digits aren’t always straightforward, as the ‘9’ doesn’t denote 1989 or 1999.
Variations exist; some models have four-digit codes, while others, like this saw, utilize five, showcasing evolving manufacturing practices.
Storage and Transportation
Proper storage safeguards your Craftsman power washer from damage and ensures longevity. Securely store the unit in a clean, dry environment, protected from freezing temperatures. When transporting, ensure the power washer is empty of all water and oil to prevent leaks and potential hazards.
Always stabilize the unit during transport to avoid tipping or shifting, potentially causing damage to components.
Safe Storage Practices
To maximize the lifespan of your Craftsman power washer, implement these safe storage practices. Store the unit indoors, shielded from the elements, particularly freezing conditions which can damage the pump. Ensure the power washer is completely drained of water before long-term storage to prevent corrosion and internal damage.
Keep the unit in a secure location, away from children and unauthorized access, and regularly inspect for any signs of wear or potential issues.

Transporting Your Power Washer
When transporting your Craftsman power washer, ensure it’s completely drained of water to prevent damage and potential leaks. Secure the unit properly in a vehicle, preventing shifting during transit. Consider using tie-down straps or a protective bed liner to minimize movement and potential impacts.
Avoid abrupt stops and turns, and always prioritize safe driving practices when carrying the power washer.
Warranty Information
Craftsman power washer warranties vary depending on the model and purchase date. Generally, warranties cover defects in materials and workmanship for a specified period, often one to three years.
Review your purchase documentation carefully to understand the specific terms and conditions of your warranty. Registration may be required to activate full coverage. Contact Sears or SBD for warranty claims and service information.
Finding Replacement Parts
Locating replacement parts for your Craftsman power washer can be done through several avenues. Sears PartsDirect is a primary resource, offering a wide selection of components. Additionally, online retailers specializing in power washer parts often carry Craftsman-compatible items.
Having your model number is crucial for accurate part identification. Local hardware stores may also stock common replacement parts like nozzles and hoses.
Resources and Support
For additional assistance with your Craftsman power washer, several resources are available. The Sears PartsDirect website provides helpful diagrams and troubleshooting guides. Online forums dedicated to power washers often feature discussions and solutions specific to Craftsman models.
Contacting Craftsman’s customer support directly can offer personalized assistance with any issues you may encounter. Remember to have your model number readily available.